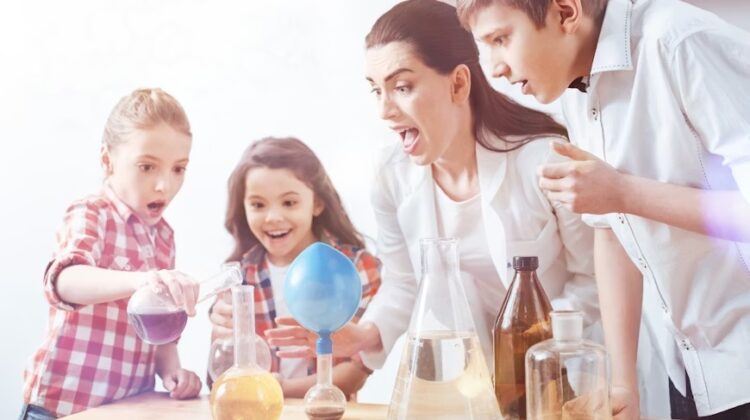
The Top 10 Science Experiments You Can Easily Try at Home
My nephew is nine years old and has recently decided that science is boring.
I understand where this conclusion came from. He arrived at it somewhere between the third worksheet on the water cycle and the second week of memorising the periodic table from a poster that has been on the classroom wall since probably before his teacher was born. Science, as it was being delivered to him, was a subject you endured. A collection of facts to absorb for a test and then forget.
I made him a volcano in his kitchen on a Saturday afternoon. Not a sophisticated one. Baking soda and vinegar in a plastic bottle, with red food dye and a bit of dish soap for drama. The thing overflowed spectacularly across the tray I had wisely placed underneath, and he stood there watching it with the specific quality of wonder that nine-year-olds produce when something genuinely unexpected happens right in front of them.
Then he asked why. Not in the reluctant way of someone completing an assignment. In the urgent, genuinely-curious way of someone who suddenly has a question they actually want answered.
That is what good science education produces. Not a collection of memorised answers but the habit of asking good questions — and the discovery that the world around you is full of genuinely interesting things that can be understood if you look at them carefully enough.
All ten experiments in this guide are designed to produce that feeling. They require no specialist equipment, no laboratory, and no advanced scientific knowledge. They require curiosity, a kitchen, and the willingness to make a small mess in the name of discovery. Most of them work brilliantly as parent-and-child activities, but several are interesting enough that adults will find themselves doing them alone at midnight just to see what happens.
Let us get into it.
1. The Classic Baking Soda Volcano — The Experiment That Started a Million Scientific Careers
There is a reason this experiment appears at every science fair and in the hands of every well-meaning parent trying to make science feel real. It is not just visually dramatic — though it is genuinely that — it demonstrates a chemical reaction that is important, fundamental, and instantly observable.
What You Need:
- Baking soda (two to three tablespoons)
- White vinegar (about half a cup)
- Liquid dish soap (a good squirt)
- Red or orange food colouring
- A plastic bottle, empty jar, or any container with a narrow opening
- A tray or baking dish to catch the overflow — do not skip this
How to Do It:
Place your container in the centre of the tray. This is not optional — the overflow is part of the experience and you want it going on the tray, not on your kitchen counter.
Put the baking soda into the container first. Add a squeeze of dish soap. Then mix your vinegar and food colouring together in a separate cup.
When you are ready for the eruption — and make sure everyone who wants to watch is watching — pour the vinegar mixture into the container. Step back slightly. Watch what happens.
Why It Works:
Vinegar is an acid — specifically, acetic acid. Baking soda is a base, chemically known as sodium bicarbonate. When an acid and a base combine, they undergo a neutralisation reaction that produces carbon dioxide gas. The gas produces the bubbles. The dish soap traps those bubbles, creating the foam that spills dramatically over the sides. The food colouring makes it look exactly as impressive as it sounds.
Making It More Interesting:
Try varying the ratio of baking soda to vinegar and observe whether the reaction is more or less vigorous. Try the experiment without dish soap and note the difference in how the foam behaves. You can also build an actual papier-mâché mountain around the bottle before conducting the experiment — which turns a two-minute chemical demonstration into an afternoon project.
The question worth asking afterward: why does the reaction stop? (Answer: once all of one reactant is consumed, the reaction ends. If the fizzing stops and you add more vinegar, it will start again — as long as baking soda remains.)
2. The DIY Lava Lamp — Liquid Layers and Rising Bubbles
This one is slower and more meditative than the volcano, and in some ways more satisfying for that reason. Once you set it going, you can watch it for an unreasonable amount of time. It is also an excellent demonstration of two separate scientific principles that happen to work together beautifully.
What You Need:
- A clear glass or jar — the taller the better
- Vegetable oil (enough to fill about three-quarters of the container)
- Water (enough to fill the remaining quarter)
- Food colouring — a few drops
- An Alka-Seltzer tablet (or half a tablet for a smaller container)
How to Do It:
Pour the vegetable oil into the glass first until it is about three-quarters full. Then carefully add water until the glass is nearly full, leaving a small gap at the top. Add several drops of food colouring — watch what happens to the drops as they fall through the oil layer into the water. Then break off a piece of the Alka-Seltzer tablet and drop it in.
Why It Works:
Two principles are at work here. The first is density — oil is less dense than water, which is why it sits on top regardless of which you pour in first. Water, being denser, sinks to the bottom. The food colouring, being water-based, falls through the oil and colours only the water layer.
The second is the Alka-Seltzer reaction. The tablet contains citric acid and sodium bicarbonate — similar to the vinegar and baking soda in the volcano experiment. When these react with the water, they produce carbon dioxide bubbles. Those bubbles attach to droplets of coloured water, making them buoyant enough to float up through the oil. When the bubbles reach the surface and pop, the water droplet falls back down. The result is a continuous rising-and-falling cycle that looks remarkably like a lava lamp.
The Extra Detail Worth Knowing:
The experiment illustrates why oil and water do not mix even when you stir them vigorously. It comes down to molecular polarity — water molecules are polar (one end has a slight positive charge, the other a slight negative charge) while oil molecules are non-polar. Polar and non-polar substances repel each other in a very fundamental chemical sense. This principle — “like dissolves like” — is one of the foundational concepts in chemistry and explains everything from why soap works to how drugs are designed to cross biological membranes.
3. Invisible Ink — Secret Messages Revealed by Heat
This experiment has the advantage of feeling genuinely magical even once you understand the science. The idea of writing a message that cannot be seen until specific conditions are applied has obvious appeal for children, but the chemistry behind it is interesting enough to hold adult attention too.
What You Need:
- Lemon juice (freshly squeezed if possible, bottled if not)
- A cotton swab or small paintbrush
- White paper
- A heat source — a lamp with an incandescent bulb, a hair dryer, or an iron on a low setting
How to Do It:
Dip your cotton swab or paintbrush into the lemon juice and write your message on the paper. Use enough juice to make visible marks while you are writing, but do not soak the paper. Allow the paper to dry completely — this is important. The message must be invisible before you attempt to reveal it.
Once dry, apply heat. If using a lamp, hold the paper close to the bulb and move it slowly. If using a hair dryer, keep it moving rather than holding it in one spot. If using an iron, place a cloth between the iron and the paper and use a low setting. The message will gradually appear, darkening against the white paper.
Why It Works:
Lemon juice is a mildly acidic compound containing citric acid. When it is applied to paper and allowed to dry, it is effectively invisible — the concentration is too light to see. But the acid weakens the cellulose fibres of the paper wherever it was applied.
When heat is applied, the weakened areas oxidise — react with oxygen in the air — at a lower temperature than the untreated paper. Oxidation produces a brown colouration. The message appears because the lemon-juice areas turn brown before the untreated paper does. The same principle explains why milk works as well — the organic compounds in milk undergo a similar oxidation reaction when heated.
Variations Worth Trying:
Onion juice works. White wine works. Apple juice works. Orange juice works. Any mildly acidic organic liquid can serve as invisible ink in this way. Comparing how clearly different substances reveal their messages at the same heat level makes for an excellent comparison experiment.
4. Homemade Slime — When Chemistry Gets Tactile
Slime has become a cultural phenomenon in its own right — a cottage industry of recipes, tutorials, and dedicated practitioners who have refined the process to extraordinary degrees. Underneath the cultural moment is a genuinely interesting piece of polymer chemistry that is worth understanding.
What You Need:
- White PVA school glue (half a cup)
- Water (half a cup)
- Borax powder (one teaspoon) OR liquid starch as an alternative
- Food colouring (optional)
- Glitter (optional, but strongly recommended by nine-year-olds)
- Two bowls
How to Do It:
In the first bowl, mix the half cup of glue with the half cup of water thoroughly. Add food colouring and glitter at this stage if you are using them.
In the second bowl or cup, dissolve the borax powder in one cup of warm water, stirring until it is as dissolved as possible. Alternatively, use liquid starch directly.
Now slowly add the borax solution to the glue mixture a little at a time, stirring continuously. You will feel the mixture start to change texture almost immediately — it will become more resistant to stirring, start to pull away from the sides of the bowl, and gradually transform into a coherent, stretchy mass. Keep adding and stirring until the slime is no longer sticking to your hands excessively.
Why It Works:
PVA glue is a polymer — a long-chain molecule made of repeating units. In its liquid state, those chains are tangled together but can slide past each other freely, which is why glue flows. When borax is added, it forms chemical bridges between the polymer chains — a process called cross-linking. These bridges prevent the chains from sliding past each other freely, turning the liquid into a semi-solid material with elastic properties.
The result is a non-Newtonian fluid — a substance that does not behave like a conventional liquid. It flows slowly under low stress but becomes rigid under sudden impact. This is why slime oozes when you hold it in your palm but snaps and tears if you pull it suddenly. Cornstarch mixed with water, oobleck as it is commonly called, is another excellent non-Newtonian fluid that demonstrates the same principle with even simpler ingredients.
The Borax Safety Note:
Borax is safe in the quantities used here when handled normally, but it should not be ingested, and hands should be washed after handling. For younger children, liquid starch is a safer alternative that produces a similar result.
5. The Balloon Rocket — Newton’s Third Law in Your Living Room
This experiment moves science off the kitchen counter and into physical space — which makes it particularly good for children who need to move around and experience things kinetically rather than by watching.
What You Need:
- A long balloon (the kind used for balloon animals works better than round ones)
- A length of string — at least three metres, ideally longer
- A drinking straw
- Tape
How to Do It:
Thread the string through the drinking straw. Tie each end of the string to two fixed points — chair backs, door knobs, or anything stable — at opposite ends of a room. The string should be pulled reasonably taut and roughly horizontal.
Inflate the balloon but do not tie it. Hold the opening closed. Tape the balloon to the straw — two or three pieces of tape, enough to hold securely. Slide the straw toward one end of the string so that it is starting from one side.
When ready, release the opening of the balloon. The balloon will travel along the string, propelled by the escaping air, until the air is exhausted.
Why It Works:
This experiment directly demonstrates Newton’s Third Law of Motion — one of the fundamental principles of classical mechanics. The law states that for every action, there is an equal and opposite reaction.
When air is pushed backward out of the balloon, an equal force pushes the balloon forward. This is the same principle that propels rockets. Rockets do not push against the atmosphere — they push against the exhaust gases they expel, and those gases push back, driving the rocket in the opposite direction. This is why rockets work in the vacuum of space where there is nothing to push against except the exhaust.
Making It a Proper Experiment:
Try varying the size of the balloon (more air = more thrust, but also more weight), the angle of the string (what happens if the string slopes slightly upward?), and the weight attached to the balloon. You can tape a small piece of paper to the straw and write a message on it — a genuinely delivered rocket mail.
6. Glowing Tonic Water — Fluorescence Under Ultraviolet Light
This experiment is best done in a dark room and produces one of the more visually striking effects on this list with remarkably minimal effort.
What You Need:
- Tonic water (the kind used in gin and tonic — any brand)
- A UV or blacklight bulb (available cheaply online or from party supply shops)
- A clear glass or container
How to Do It:
Pour the tonic water into the clear glass. Take it into a dark room or conduct the experiment at night with the lights off. Turn on the UV light and point it at the glass.
Why It Works:
Tonic water contains quinine — a compound originally derived from the bark of the cinchona tree and historically used as an antimalarial medication. Quinine is fluorescent, meaning it absorbs ultraviolet light (which is invisible to human eyes) and re-emits that energy as visible blue-white light.
This process — absorbing light at one wavelength and emitting it at another — is called fluorescence, and it is the same principle behind fluorescent paints, highlighter pens, and the white-brightening agents added to laundry detergents that make clothes glow slightly under UV lights. Many biological molecules are naturally fluorescent, which is why UV lights are used in some forensic applications.
Extending the Experiment:
Compare tonic water with regular sparkling water under the UV light — the sparkling water will not glow, confirming that it is the quinine specifically causing the effect. Try different white materials under the UV light and note which ones glow — a shirt washed with a brightening detergent will likely show up clearly. This opens a conversation about how fluorescence is used across science, medicine, and everyday life.
7. The Homemade Electromagnet — Turning Electricity Into Magnetism
This experiment demonstrates one of the most important relationships in physics — the connection between electricity and magnetism — using components that cost almost nothing and can be assembled in five minutes.
What You Need:
- A large iron nail (the bigger, the better)
- Thin copper wire — around one metre (available from hardware shops cheaply)
- A D-cell battery
- Small metal objects to pick up — paper clips work well, as do small screws or iron filings
How to Do It:
Leave about twenty centimetres of wire free at each end, and then wrap the remaining wire tightly around the nail in tight, close coils — going in the same direction throughout. The more coils you can fit, the stronger the electromagnet. Connect one free end of the wire to each terminal of the battery.
Test the electromagnet by holding the nail near your paper clips. Pick them up. Then disconnect one wire from the battery and observe what happens to the paper clips.
Why It Works:
When electric current flows through a wire, it generates a magnetic field around that wire. This relationship — between moving electric charge and magnetism — is one of the foundational discoveries of nineteenth-century physics, established through the work of Hans Christian Ørsted, André-Marie Ampère, and later James Clerk Maxwell, whose equations unified electricity and magnetism into a single theoretical framework.
When the wire is coiled around the iron nail, the magnetic fields from each individual coil add together, concentrating the magnetic force. The iron nail, being a ferromagnetic material, becomes magnetised by this field — amplifying the overall magnetic strength considerably. When the current stops, the magnetic field collapses, and the nail loses most of its magnetism, releasing the paper clips.
The Variation Worth Trying:
Try adding more coils and observe whether the electromagnet becomes stronger. Try substituting a non-iron object — a plastic pen, a wooden dowel, a copper pipe — and observe whether the effect is the same. This reveals that the iron core matters — not all materials respond to magnetic fields in the same way.
8. The Dancing Raisins — Carbon Dioxide in a Glass
This experiment is simple enough to set up in thirty seconds and produces a genuinely satisfying result that prompts good questions.
What You Need:
- A clear glass or container
- Clear fizzy drink — lemonade or sparkling water work well
- A handful of raisins
How to Do It:
Fill the glass with the fizzy drink. Drop in several raisins. Watch what happens over the next few minutes.
Why It Works:
The wrinkled, rough surface of raisins provides many tiny locations where carbon dioxide bubbles can nucleate — form and cling to the surface. As bubbles accumulate on a raisin, they provide enough collective buoyancy to lift the raisin toward the surface of the drink. At the surface, the bubbles pop or detach, the raisin loses its buoyancy, and it sinks. Bubbles accumulate again at the bottom, the cycle repeats.
This experiment demonstrates buoyancy — the principle that an object rises when it displaces a volume of fluid whose weight exceeds its own — and also demonstrates nucleation, which is why ice cream soda fizzes much more vigorously when the ice cream is added (the rough ice cream surface provides thousands of nucleation sites) and why flat beer placed in a glass with scratches inside the glass fizzes continuously in that location.
The Question Worth Asking:
What would happen if you used a smooth object of similar weight and size to a raisin — a small, smooth bead, for example? This prediction — that fewer bubbles would form on the smooth surface — is directly testable.
9. The Walking Water Experiment — Capillary Action Made Visible
This experiment requires patience — it works over hours rather than minutes — but the result is quietly spectacular and introduces a concept that is fundamental to how plants function.
What You Need:
- Several glasses or jars — six works well
- Paper towels
- Water
- Food colouring — at minimum, red, yellow, and blue
How to Do It:
Arrange six glasses in a circle. Fill the first, third, and fifth glasses with water. Leave the second, fourth, and sixth empty. Add red food colouring to the first glass of water, yellow to the third, and blue to the fifth.
Roll or fold paper towels into thick strips and place one strip between each adjacent glass, with each end submerged in or resting in the relevant glass.
Leave the experiment for several hours — ideally overnight for the best results.
Why It Works:
Water molecules are attracted to each other — a property called cohesion — and are also attracted to the cellulose fibres in the paper towel — a property called adhesion. These two attractions working together produce capillary action: the ability of water to move through narrow spaces against gravity.
The water travels up the paper towel and down into the adjacent empty glass. Where two coloured waters meet in a previously empty glass, they combine to form secondary colours — red and yellow make orange, yellow and blue make green, blue and red make purple. The experiment creates a colour wheel while demonstrating the physics of capillary action.
Why This Matters Beyond the Kitchen:
Capillary action is the primary mechanism by which water moves from the roots of a plant upward through its stem and into its leaves — a process that works against gravity in trees that can be thirty metres tall. Understanding capillary action is understanding one of the fundamental mechanisms of plant life.
10. The Egg in a Bottle — Air Pressure Does Surprising Things
This experiment requires adult supervision and the ability to handle a briefly burning object safely. The result is genuinely astonishing and prompts excellent questions about the invisible force that the atmosphere is exerting on everything around us at all times.
What You Need:
- A glass bottle with an opening slightly smaller than a hard-boiled egg (a milk bottle or wide-mouthed glass bottle works well)
- A hard-boiled egg, peeled
- A small piece of paper
- Matches or a lighter
- Vegetable oil (a small amount)
How to Do It:
Lightly oil the rim of the bottle opening to reduce friction. Light the small piece of paper and drop it carefully into the bottle. Immediately place the peeled hard-boiled egg on top of the bottle opening, small end down.
Observe what happens.
Why It Works:
The burning paper heats the air inside the bottle, causing it to expand — some air escapes around the egg. When the flame goes out, the air inside cools rapidly, contracting and reducing the air pressure inside the bottle relative to the atmospheric pressure outside. The atmospheric pressure pressing down on the egg from above becomes greater than the pressure pushing up from inside the bottle. The pressure difference pushes the egg into the bottle.
This experiment makes viscerally visible something that is otherwise invisible — the weight of the atmosphere. At sea level, the atmosphere is pressing on every square centimetre of your body with approximately one kilogram of force. You do not feel it because the pressure is equal in all directions, and your body’s internal pressure is in equilibrium with it. But change the pressure on one side of a boundary — as this experiment does — and the atmospheric force becomes suddenly, dramatically apparent.
The Bonus Challenge:
Once you have the egg inside the bottle, can you get it out without breaking it? The answer involves reversing the pressure differential — by warming the air inside the bottle, you can increase the internal pressure enough to push the egg back out. Holding the bottle upside down over a heat source, or running hot water over the sealed end, can achieve this.
A Final Word on Why This Matters
Every experiment in this guide can be done in under an hour, with materials that cost almost nothing. But each one opens onto concepts — chemical reactions, fluid dynamics, electromagnetism, atmospheric physics, polymer chemistry — that are central to how the world works and that form the foundation of fields from materials science to aerospace engineering to pharmaceutical development.
The most important outcome of any of these experiments is not knowing the result in advance. It is the moment of genuine curiosity — the asking of the question “but why does it do that?” — that transforms a kitchen demonstration into the beginning of scientific thinking.
That kind of thinking — observation, question, hypothesis, test, conclusion, new question — is not just a methodology for laboratories. It is the most reliable approach available to human beings for understanding reality accurately rather than conveniently. And it starts, more often than not, with a volcano overflowing across a kitchen tray and a child standing there wondering how it works.
If you try any of these experiments and something surprising happens, share it with someone. Science is better as a conversation than as a spectacle. And find more science and learning content right here on DennisMaria.